
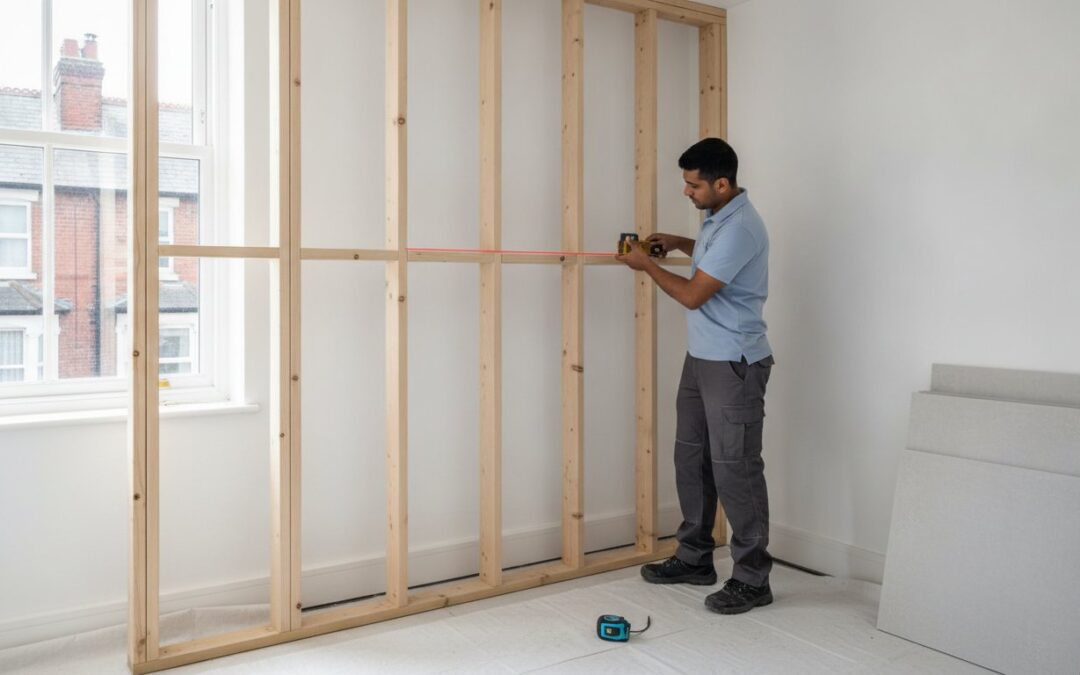
Nearly 30% of all interior home renovations in the UK focus on the bathroom, making it the most popular room to upgrade in 2026. It’s a project that brings a lot of excitement, but it also comes with unique challenges. You’re likely concerned about hidden moisture damage or whether your frame can support the weight of heavy tiles. When you’re building a stud wall for a bathroom, you need to get the structural details right from the very start to avoid costly repairs later on.
We believe that a professional finish starts with a solid foundation. This guide will show you how to master the essentials of constructing a durable, moisture-resistant stud wall that handles plumbing and electrical voids with ease. We’ll walk you through the essential materials like C16 timber and moisture-resistant plasterboard, while ensuring you stay on the right side of current building regulations. You’ll finish this article with the confidence to create a sturdy, level wall that’s perfectly prepared for boarding and tiling.
Key Takeaways
- Learn why selecting C16 or C24 pressure-treated timber and rust-resistant fixings is essential for long-term durability in wet rooms.
- Discover the professional method for building a stud wall for a bathroom by using laser levels to guarantee a perfectly plumb foundation.
- Master the placement of horizontal noggins to provide secure mounting points for heavy fixtures like basins and towel rails.
- Understand how to create service voids for plumbing and electrics whilst maintaining the structural strength of your timber frame.
- See how precise framing prevents common issues like cracked grout lines and ensures your tile finish looks professional for years.
Understanding the Essentials of Bathroom Stud Wall Construction
A bathroom stud wall is more than a simple room divider. It is a moisture-aware timber frame partition specifically engineered to survive in high-humidity environments. Whilst a bedroom wall only needs to support its own weight and perhaps a few pictures, building a stud wall for a bathroom involves creating a structure that can handle steam, water splashes, and heavy fixtures. These Wall studs form the skeleton of the room, providing a crucial service void to conceal the complex network of pipes and cables required for modern suites.
Why Moisture Resistance is Non-Negotiable
Humidity is the primary enemy of timber. In a bathroom, steam is a daily occurrence, and standard untreated timber will eventually succumb to rot. One of the biggest risks is “wicking.” This happens when water on the floor is absorbed by the bottom timber track, allowing moisture to travel upwards into the frame. Professional 2026 standards prioritise the use of pressure-treated CLS timber and vapour barriers. These materials act as a shield, preventing damp from compromising the structural integrity of your home and preventing the growth of mould behind your tiles.
Weight Capacity and Tiling Requirements
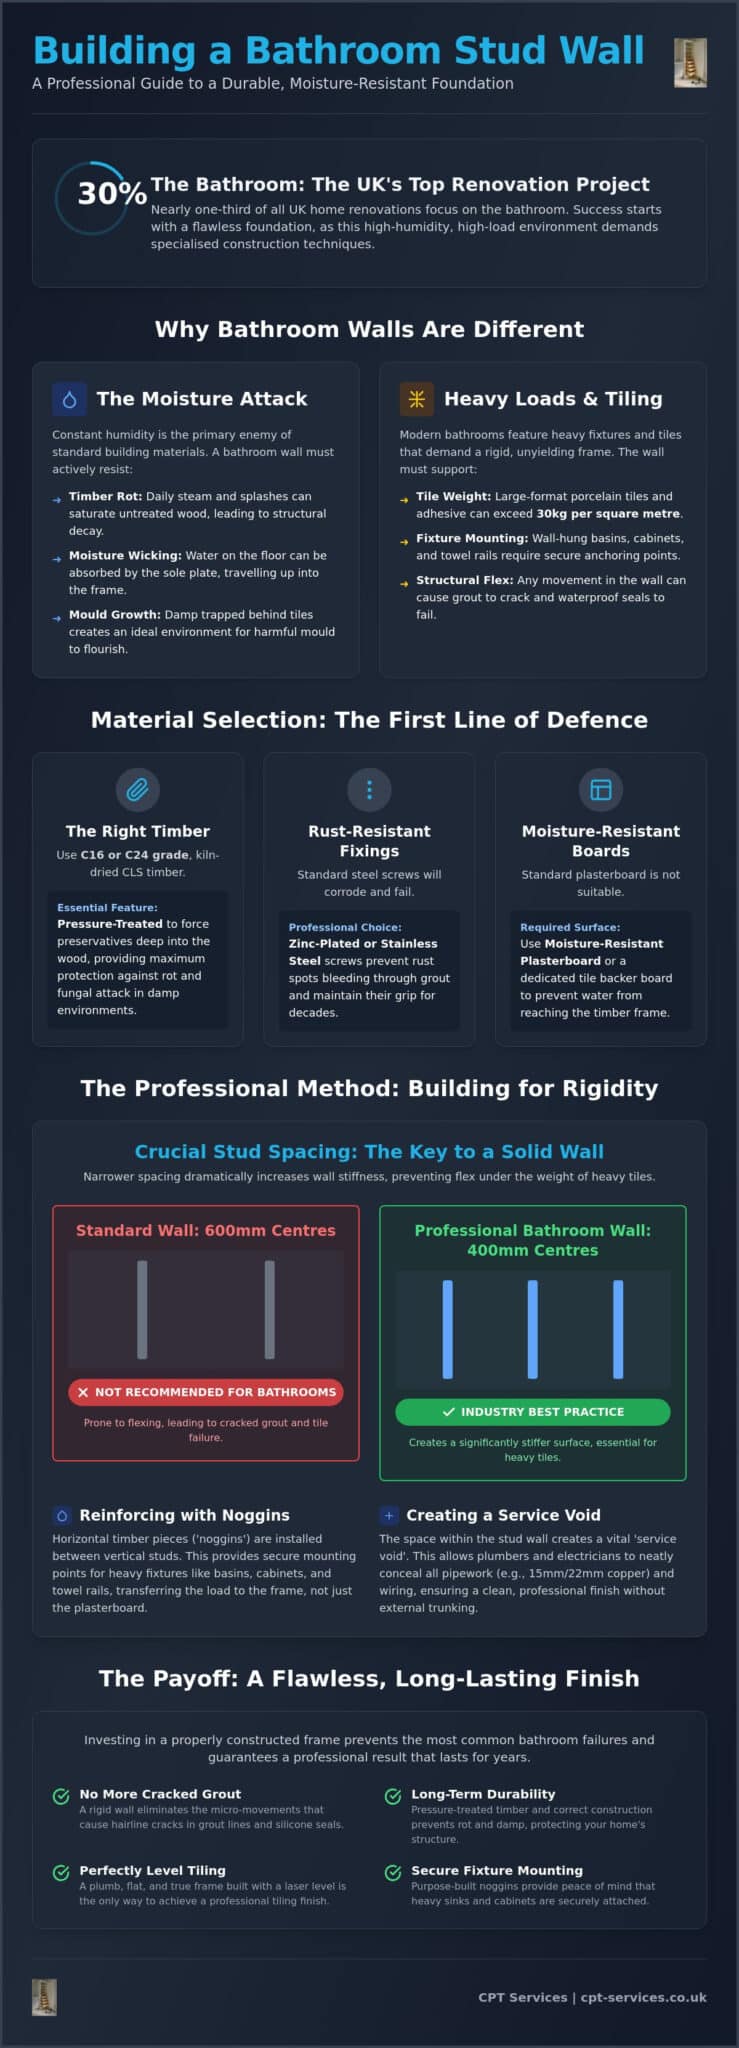
The trend for large-format porcelain tiles has changed how we think about wall strength. A single square metre of these tiles, combined with a thick bed of adhesive, can weigh upwards of 30kg. If the wall isn’t rigid enough, it will flex under this weight. This movement is the most common reason for grout cracking and silicone seals failing around baths and showers. To prevent this, we move away from standard 600mm stud centres. We use 400mm centres instead. This narrower spacing increases the number of vertical supports, creating a much stiffer surface for your backing boards. High structural stiffness is essential because it ensures the wall doesn’t bow or vibrate, keeping your expensive tile finish perfectly intact for the long term.
The Role of the Service Void
Bathrooms are service-heavy rooms. You need space for 15mm or 22mm copper pipes, waste pipes, and electrical conduit for showers or lighting. A well-planned stud wall creates a dedicated service void. This allows all these components to be hidden behind the wall surface without the need for messy external trunking. It also means you can install wall-hung basins or toilets by reinforcing the frame within the void itself. When building a stud wall for a bathroom, planning these voids early ensures that plumbers and electricians can work efficiently without compromising the strength of the timber studs.
Planning and Material Selection for Wet Environments
Choosing the right materials is the difference between a wall that lasts decades and one that fails within five years. When you are building a stud wall for a bathroom, you cannot simply use the same offcuts left over from a bedroom project. Every component must be selected for its ability to withstand high humidity and the constant cycle of heating and cooling. Starting with a clear plan for your timber and fixings ensures the structural skeleton remains straight and true, even in the dampest conditions.
Timber Grades and Dimensions
Industry standards for bathroom partitions typically require 3×2 (63mm) or 4×2 (95mm) CLS timber. CLS stands for Canadian Lumber Standard, and it is preferred because the edges are rounded and the surfaces are planed smooth. This makes it easier to handle and ensures a more consistent depth across the frame. We recommend using C16 or C24 pressure-treated timber. The treatment process forces preservative chemicals deep into the wood, which protects it against rot and fungal attack.
Always look for kiln-dried timber. This has been dried in a controlled environment to reduce its moisture content, which minimises the risk of the wood warping or shrinking after it is installed. Before you start cutting, check each length for “crowns” or bows. By sighting down the edge of the timber, you can see any natural curves. You should install all studs with the crown facing the same direction to ensure the finished wall is flat rather than wavy. If you find the planning phase overwhelming, our team at CPT Services can help with professional bathroom installations to ensure your project starts on a level footing.
The Role of Fixings and Sole Plates
Standard steel screws will rust quickly in a bathroom environment. As they corrode, they lose their grip and can cause unsightly rust spots to bleed through your plaster or grout. You should only use zinc-plated or stainless steel screws for your frame. These are designed to resist the corrosive effects of moisture. The sole plate, which is the timber track that sits on the floor, is a critical component. It should be separated from the floor by a damp-proof course (DPC) or a bead of silicone. This simple step creates a physical barrier that stops floor-level spills from soaking into the base of your timber frame.
Specialist Bathroom Wall Boards
Standard grey plasterboard is not suitable for wet zones. It absorbs water like a sponge, leading to “blown” plaster and falling tiles. For general bathroom areas, moisture-resistant “green board” is the minimum requirement. This board contains silicone additives in the core that repel water. However, for direct-to-shower enclosures or areas around a bath, cement-based backer boards are the superior choice. These boards do not rot, swell, or degrade when saturated. We always use 12.5mm thick boards to provide the necessary structural rigidity to support heavy porcelain or stone tiles without flexing.
Step-by-Step Guide: Building a Stud Wall for a Bathroom
Constructing the frame is where your planning meets reality. When building a stud wall for a bathroom, the layout determines the success of every subsequent trade, from the plumber to the tiler. Precision at this stage prevents the frustration of trying to fit a standard-sized bath into a gap that is 5mm too narrow. You should start by marking your positions clearly on the floor, ceiling, and adjacent walls using a laser level or a traditional plumb bob. A laser level is particularly useful in bathrooms because it projects a continuous line across uneven surfaces, making it easier to see how your new partition interacts with existing fixtures.
The Layout Phase: Avoiding Costly Mistakes
Many older properties in Leicester have walls that are significantly out of true. If you simply follow the line of an existing wall, your new partition might end up crooked. Always measure from a fixed point to ensure the new wall is square to your shower tray or bath. When marking out the door opening, remember to leave an extra 50mm of width. This allowance provides space for the door lining and ensures your finished flooring can run neatly under the architrave. Before you drill into the floor to fix your sole plate, use a pipe and cable detector. It is common to find underfloor heating manifolds or 22mm mains water pipes running directly beneath bathroom floors.
Assembling the Frame
Once your lines are marked, you can begin fixing the head and sole plates. The head plate must be screwed directly into the ceiling joists for maximum stability. If the joists run parallel to your new wall, you may need to install noggins between them to provide a solid fixing point. For the vertical studs, we recommend a 400mm centre-to-centre spacing. This is tighter than the standard 600mm used in dry rooms, but it is necessary to support the weight of moisture-resistant boards and heavy porcelain tiles.
You can secure the vertical studs using a technique called “toenailing,” where screws are driven at a 45-degree angle through the stud and into the plate. Alternatively, pocket-hole screws provide a very clean and incredibly strong joint. If you are working alone, use a few “prop” timbers or quick-release clamps to hold the vertical studs in place whilst you check them for plumb. A slight lean in the frame will be magnified once the tiles are applied, so take the time to check every stud with a long spirit level. Once the frame is secure, do a final check to ensure it is square and level before any plumbing or electrical work begins.
Reinforcing for Tiles and Managing Plumbing Voids
Once your vertical skeleton is in place, you need to think about what will hang on it. Building a stud wall for a bathroom is a multi-trade effort. You are creating a structure that must support both the decorative finish and the daily functionality of the room. This phase involves adding horizontal braces, known as noggins, and managing the service voids where your plumbing and electrics will live. Skipping these reinforcements now will lead to loose fixtures and cracked grout later.
Placing Noggins for Heavy Fixtures
Standard noggins provide lateral stability, but in a bathroom, they serve a more specific purpose. You must install them at the exact heights required for your radiator brackets and towel rails. Most bathroom radiators sit approximately 150mm to 200mm above the finished floor level. If you are installing a wall-hung basin, standard noggins might not be enough. We recommend using 18mm plywood patressing between the studs. This creates a solid, continuous timber surface that can take the weight of a heavy ceramic sink without the risk of the fixings pulling out of the plasterboard. Always take a photograph of the wall with a tape measure in the frame before you apply the boards. This documentation is invaluable when you need to find your fixing points through the tiles later.
Managing Pipes and Electrics
Your service void needs to accommodate 15mm or 22mm water pipes and larger 32mm or 40mm waste pipes. You should avoid notching the studs whenever possible, as this can weaken the structure. If you must notch, never go deeper than 0.25 of the stud’s depth. Drilling through the centre of the stud is a much stronger alternative. Ensure the holes are large enough to allow for the thermal expansion of hot water pipes. To prevent accidents during the final stages of the build, we always install metal nail plates over the studs where pipes pass through. This simple step protects your plumbing from being pierced by a plasterboard screw or a skirting board fixing. If you want to ensure your pipework is managed correctly, our team can provide expert bathroom installations that handle these technical details for you.
Finally, consider the comfort of the surrounding rooms. Bathrooms are noisy spaces. Whilst the wall is open, you should pack the gaps amongst the studs with acoustic mineral wool. This material is denser than standard thermal insulation. It significantly reduces the sound of running water or extractor fans travelling through the partition. This small investment in soundproofing makes a massive difference to the overall feel of your home. Taking these extra steps during the framing process ensures your new bathroom is as quiet as it is sturdy.
Professional Bathroom Installations in Leicester: Why Quality Framing Matters
Quality framing is the unsung hero of every beautiful bathroom. You might choose the most expensive porcelain tiles in the showroom, but they will never look right on a wonky wall. When building a stud wall for a bathroom, a professional carpenter ensures every vertical is perfectly plumb and every corner is exactly 90 degrees. This precision allows your tiler to work with consistent grout lines. It also prevents the need for ugly, tapered tile cuts in the corners where walls meet. A millimetre of error at the floor level can lead to a centimetre of deviation by the time you reach the ceiling.
At CPT Services, we ensure that every partition we build meets or exceeds British building standards. This is particularly important in complex ensuite or “Jack and Jill” bathroom configurations where multiple doorways and service voids are required. We handle the structural heavy lifting so you can focus on the aesthetic design. If you are planning a full renovation, we can guide you through a complete bathroom installation in Leicester from the first timber stud to the final silicone bead.
The CPT Services Approach to Carpentry
We bring decades of local Leicestershire expertise to every project. Our background in bespoke joinery and woodwork means we understand how timber behaves in high-humidity environments. We only use premium, sustainably sourced timber that has been properly seasoned to prevent twisting. This level of care is a hallmark of our business. You can see the same attention to detail in our expert kitchen installations, where precision framing is equally vital for a seamless finish. We don’t believe in cutting corners; we believe in building things that last.
When to Call the Professionals
Whilst many homeowners enjoy a DIY project, some tasks require a professional touch. If your project involves structural timber repairs or moving an existing load-bearing wall, expert intervention is essential. We offer a dedicated “first fix” carpentry service. This is a great option for DIYers who want the peace of mind that their framework is solid and level before they take over the boarding and tiling. It saves significant time and reduces the stress of trying to fix framing errors later in the build. Getting the skeleton of the room right is the best investment you can make.
If you are based in Leicester and need help building a stud wall for a bathroom, we are here to help. We believe in straightforward, honest advice without the flashy sales pitch. We invite you to contact us for a complimentary consultation to discuss your project requirements. Whether it is a small ensuite or a large family bathroom, we provide the same dependable, high-quality service to every customer in our local community.
Get Your Bathroom Renovation Right from the Start
Building a stud wall for a bathroom is the foundation of a successful renovation. You now understand the importance of using C16 pressure-treated timber and the need for precise 400mm centres to support heavy porcelain tiles. By planning your service voids and reinforcing the frame with plywood patressing, you ensure your fixtures remain secure for years to come. These professional steps prevent the damp and structural movement that often plague standard partition walls.
If you prefer the peace of mind that comes with expert execution, our team is ready to help. CPT Services has been a dependable part of the Leicester community since 2014. We specialise in structural timber repairs and bespoke joinery, bringing a high level of precision to every bathroom partition we build. We offer all Leicestershire residents a complimentary consultation to discuss their specific project needs. Book a professional bathroom consultation with CPT Services in Leicester to ensure your home improvement project is built on a solid, level foundation. We look forward to helping you create a bathroom that is both beautiful and built to last.
Frequently Asked Questions
Do I need to use treated timber for a bathroom stud wall?
Yes, you should always use pressure-treated timber for any bathroom framing project. Standard untreated wood is susceptible to rot and fungal growth in high-humidity environments. By using C16 or C24 treated CLS, you ensure the frame resists the damp conditions common in wet rooms. This is a critical step when building a stud wall for a bathroom, as it protects the structural integrity of your home from long-term moisture damage.
What is the best spacing for studs in a bathroom wall?
The professional standard for bathroom stud spacing is 400mm centres. Whilst 600mm is often used in bedrooms, it doesn’t provide enough rigidity for heavy bathroom tiles. Tighter spacing creates a stiffer surface that prevents the wall from flexing. This extra support is vital for preventing grout from cracking and ensuring that large-format porcelain tiles remain securely bonded to the wall surface for many years.
Can I build a stud wall directly onto a floorboarded surface?
You can build onto floorboards, but the sole plate must be securely fixed into the underlying floor joists. Simply screwing into the floorboards alone won’t provide a stable foundation for a heavy, tiled wall. You should use a pipe detector to locate joists and avoid any plumbing or electrical cables. If the floorboards are uneven, you may need to shim the sole plate to ensure the entire frame starts perfectly level.
How do I reinforce a stud wall for a wall-hung basin?
Reinforcement is best achieved by installing 18mm plywood patressing between the vertical studs at the required height. This provides a solid timber surface for the basin’s mounting bolts to bite into. Standard plasterboard or even moisture-resistant board cannot support the weight of a ceramic basin on its own. Ensure the plywood is flush with the front of the studs so your wall boards sit flat against the entire frame.
Is moisture-resistant plasterboard enough, or do I need cement board?
Moisture-resistant “green board” is suitable for most bathroom areas, but shower enclosures require cement-based backer boards. Cement boards are completely waterproof and won’t degrade if water gets behind the tiles. When building a stud wall for a bathroom, we recommend using 12.5mm cement board in any high-splash zones. This provides the ultimate protection against damp and ensures your shower tiles stay in place without the risk of the substrate failing.
What thickness of timber should I use for a bathroom partition?
The industry standard is 63mm (3×2) or 95mm (4×2) CLS timber. The 95mm option is often preferred if you need to accommodate larger 40mm waste pipes or heavy-duty soundproofing within the wall cavity. Using CLS is beneficial because the rounded edges and planed surfaces make the timber easier to handle and more consistent in size. This consistency is essential for creating the perfectly flat surface required for a high-end tile finish.
Do I need building regulations approval for a new bathroom stud wall?
You generally don’t need approval for a non-load-bearing internal partition wall. However, you must seek approval if the wall is load-bearing or if you are creating a brand-new bathroom where one didn’t exist before. Any electrical work in the bathroom is also “notifiable” under Part P of the Building Regulations. It’s always best to check with your local building control office if you are unsure about your specific project.
How do I soundproof a bathroom stud wall effectively?
The most effective method is to pack the stud cavities with acoustic mineral wool before boarding. This material is much denser than standard glass fibre insulation and is designed to absorb sound waves. You can also use “acoustic” plasterboard, which is heavier and further reduces noise transmission. These steps are particularly useful if the bathroom shares a wall with a bedroom, as they help muffle the sound of running water and extractor fans.