
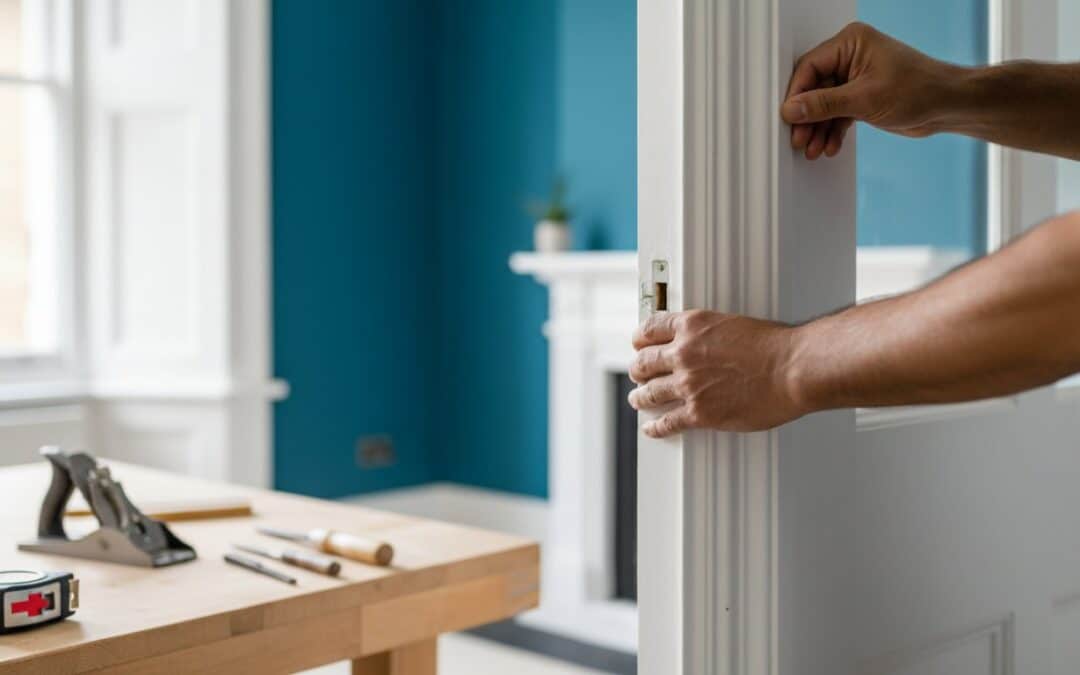
A flawless finish in your home isn’t about buying the most expensive timber; it’s about how you hide the structural imperfections of the building itself. If you’ve ever tried your hand at skirting and architrave fitting only to end up with gaping mitre joints or split wood, you know how frustrating the process can be. It’s particularly challenging in Leicester’s Victorian terraces, where walls are rarely straight and every corner presents a new hurdle. We understand that you want a durable, professional look that adds real value to your property without the headache of wobbly architraves.
We agree that nothing ruins a fresh renovation faster than a visible gap where there should be a tight joint. This guide will show you how to master the art of the scribe and ensure your trim stays secure for years to come. You’ll learn the essential carpentry techniques used by professionals to handle uneven walls and choose the right materials for 2026 trends like panel drenching. We’ll walk you through the differences between scribing and mitring, the benefits of moisture-resistant MDF, and how to stay ahead of upcoming changes like the Future Homes Standard.
Key Takeaways
- Learn why a moisture meter and high-quality wood glue are essential for ensuring a durable, long-lasting finish that won’t warp.
- Master the “reveal” technique and discover why starting your measurements with the head piece ensures a perfectly aligned door frame.
- Understand the crucial difference between mitring and scribing to achieve seamless, gap-free joints during skirting and architrave fitting.
- Discover professional “packing” methods used to maintain straight timber lines even on the uneven walls commonly found in older Leicester properties.
- Gain a clear understanding of the “Joiner’s Essentials” kit needed to transition from a DIY attempt to a professional-standard installation.
Understanding Skirting and Architrave: The Finishing Touches
Interior mouldings are the final pieces of the puzzle in any home renovation. Architraves are the decorative frames that surround your door and window openings. They do a vital job by hiding the messy joint between the timber door lining and the wall plaster. Skirting boards are the timber lengths that run along the base of your interior walls. Whilst they look great, they are primarily functional. They protect your plasterwork from the daily assault of vacuum cleaners, mop buckets, and foot traffic. High-quality skirting and architrave fitting also serves a technical purpose by concealing the expansion gaps left around the edge of new flooring.
In Leicestershire, these details matter. Whether you’re restoring a bay-fronted terrace or finishing a modern new build, the right trim adds tangible value to your property. It signals to a potential buyer that the work has been finished to a professional standard. Unlike basic DIY attempts that often leave gaps, a professional approach ensures every corner is tight and every line is straight.
The Functional Role of Interior Mouldings
Architraves aren’t just for show. They provide essential stability to door linings, helping to absorb the vibration when doors are opened and closed. This prevents cracks from appearing in your delicate plasterwork over time. Skirting boards offer similar protection. They act as a barrier against moisture and physical damage at the most vulnerable part of the wall. Understanding Skirting and Architrave is about more than just aesthetics; it’s about structural longevity. If you have unsightly wiring for your TV or internet, these mouldings provide a neat way to tuck cables out of sight without the need for expensive wall chasing.
Choosing the Right Profile for Your Property
Selecting a profile depends on the age and style of your home. Torus and Ogee profiles feature elegant curves that suit the grand proportions of Victorian and Edwardian properties. If your home is more modern, a Chamfered or Bullnose profile offers a clean, minimalist look that’s easier to clean. Getting the skirting and architrave fitting right means ensuring the two elements “speak the same language” in terms of thickness and style. Scale is key. A tall room with high ceilings often requires a skirting board between 170mm and 220mm to look proportional. Ensure your architrave matches this scale so the room feels balanced and well-proportioned.
Essential Tools and Materials for a Professional Fit
Achieving a seamless result in skirting and architrave fitting requires a specific toolkit. You won’t get professional results with just a handsaw and a hammer. A sliding compound mitre saw is vital for crisp external angles, whilst a coping saw is the only tool for accurate internal scribes. We also rely on a sharp block plane to fine-tune joints that aren’t quite sitting flush. One tool often overlooked by DIYers is the moisture meter. We use this to ensure the timber has reached an equilibrium with your home’s environment before we begin the installation.
Acclimatisation is a step you cannot skip. Timber is a natural material that expands and contracts based on humidity. We recommend leaving your boards in the room where they’ll be fitted for at least 48 hours. This prevents the wood from shrinking after it’s been nailed down, which is the leading cause of unsightly gaps appearing months later. Safety is just as important as the finish. Always wear a high-quality dust mask, especially when cutting MDF, alongside eye protection and ear defenders. If you’d rather leave the heavy lifting and precision cutting to the experts, we offer professional skirting and architrave fitting across the region.
Timber vs MDF: Which Material Wins?
Medium-Density Fibreboard (MDF) has become the industry standard for 2026 because it’s stable and free from knots. For kitchens and bathrooms, we always use moisture-resistant (MR) MDF to prevent swelling. However, for high-end Leicester renovations, nothing beats the character of solid oak or pine. Pre-primed materials save significant time on-site, though unprimed timber allows for a more bespoke stain or finish if you’re matching existing furniture or flooring.
The Professional Fixings Checklist
The type of wall dictates the fixing. For modern stud walls, lost head nails or a second-fix nail gun provide a clean finish. Older Leicester properties often have solid brick walls, which require screws and wall plugs for a secure hold. Modern “grab” adhesives are excellent for extra security, but they shouldn’t be the only thing holding the board. Finally, choose a high-quality wood filler or caulk. A good filler allows for slight movement and ensures that once the decorators have finished, the joints are completely invisible.
How to Fit Architraves: A Step-by-Step Guide
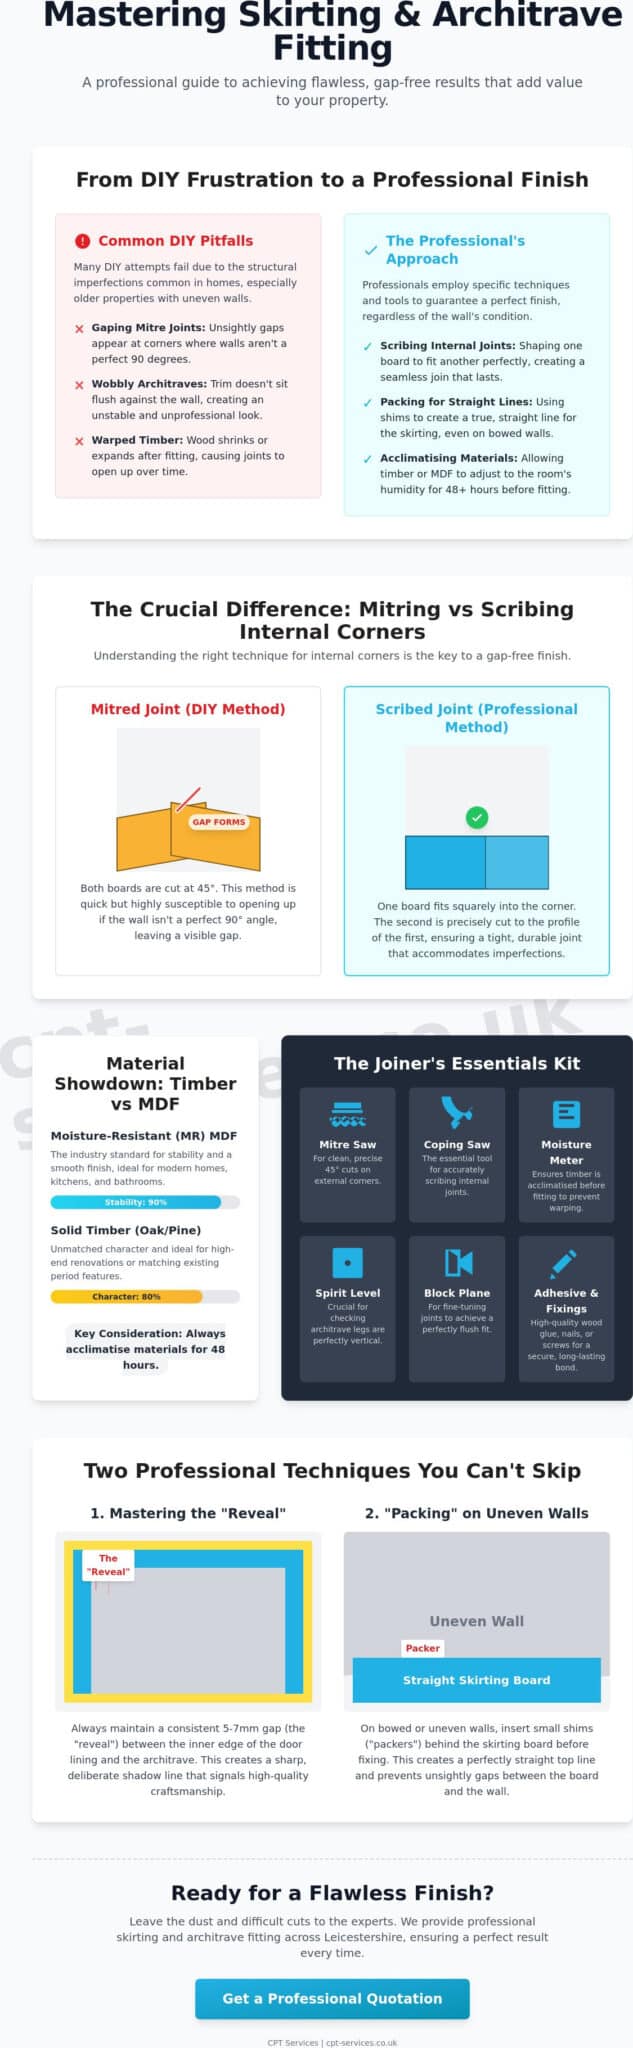
Fitting architraves is a precision task that requires more than just cutting wood at an angle. The secret to a professional finish lies in the “reveal”. This is the small, consistent gap between the inner edge of the door lining and the architrave itself. A consistent 6mm gap around the frame creates a professional shadow line and ensures door hinges have enough clearance to operate without rubbing. When we handle skirting and architrave fitting, we never assume the floor is level. Measuring from the floor up is a common mistake that leads to slanted head pieces. Instead, we always start by levelling the head section first.
Don’t rush the pinning process. Start by tacking the head piece into place with a single nail at each end. This allows for slight adjustments before you commit. When you’re happy with the alignment, use 40mm or 50mm lost head nails to secure the timber into the door lining. Avoid nailing into the plasterwork whenever possible. Plaster provides very little grip and can cause the architrave to wobble or pull away from the wall over time. A tight, secure fit here is essential before you move on to the skirting boards.
Marking the Reveal and Setting the Height
Use a combination square to mark your reveal points at 5mm to 8mm intervals around the door frame. Join these marks with a light pencil line. Place your spirit level against the head of the door lining. If the frame is slightly out of level, you must adjust your marks to ensure the architrave head remains perfectly horizontal. Once the head position is set, mark the exact points where your vertical side pieces will meet the mitre. This ensures the frame looks square even if the house has settled or the floors are uneven.
Executing the Perfect Mitre Cut
Set your mitre saw to exactly 45 degrees for the initial cuts. However, be prepared to adjust. Many door frames in older properties aren’t perfectly square, so a standard 45-degree cut might leave a gap. We often use a block plane to shave a fraction off the back of the joint for a tighter fit. For rock-solid corners, we recommend the “biscuits and glue” trick. This involves using a biscuit joiner to insert a small wooden plate into the mitre face with high-quality wood glue. It prevents the joint from opening up as the timber moves. Use a mitre clamp to hold the joint tight whilst the adhesive sets for a seamless result.
Fitting Skirting Boards: Mitring vs Scribing
Many homeowners assume that every corner in a room requires a standard 45-degree mitre. Whilst this works for external corners, using it for internal ones is a recipe for future gaps. Professional skirting and architrave fitting relies on a technique called scribing for internal joints. This involves cutting one board square into the corner and shaping the second board to fit the exact profile of the first. It’s a more time-consuming process, but it’s the only way to ensure a joint stays tight as the timber breathes and the house settles over time.
Fixing the boards correctly is just as vital as the cuts themselves. In many Leicester properties, you’ll encounter a mix of solid masonry and modern stud walls. For brick or blockwork, we recommend drilling, plugging, and screwing to ensure the timber doesn’t pull away. On stud walls, you should locate the vertical timber members and nail directly into them. If you’re dealing with a complex layout or simply want a flawless result, we provide expert skirting and architrave fitting to help you complete your project to a high standard.
The Art of the Scribe Joint
Scribed joints are superior because they allow for seasonal wood movement without opening up. To start, cut your first board square and fix it firmly into the corner. For the second board, cut a 45-degree mitre as if you were making a standard joint. This cut reveals the “profile line” of the moulding. Use a coping saw to cut along this line, removing the waste wood at a slight backward angle. This allows the second board to “seat” perfectly over the face of the first. It’s a skill that takes practice, but it results in a seamless look that filler alone can’t replicate.
Managing Long Walls and External Mitres
External corners are different. These must be mitred at 45 degrees to create a crisp, clean edge. We always suggest “back-cutting” the mitre slightly. This means the saw blade is angled so the front edge of the timber is longer than the back. It ensures the visible part of the joint touches first, leaving no gap at the front. On the long walls of a Leicestershire terrace, you’ll often need to join two boards together. Never use a simple butt joint here. Instead, use a scarf joint. This is an overlapping 45-degree mitre that is much easier to hide with a small amount of filler and a light sand, making the join virtually invisible once painted.
Achieving a Professional Finish in Challenging Spaces
Leicester is famous for its Victorian terraces, but these beautiful homes rarely have a straight wall in sight. When you’re tackling skirting and architrave fitting in an older property, you’ll likely find that the walls bow and the floors slope. A common mistake is trying to force the timber to follow every dip in the plaster. This results in a wavy finish that highlights the building’s flaws. Instead, we use timber packers or shims behind the board to maintain a perfectly straight line across the room. This creates a small gap at the top, but it’s much easier to fill a straight gap than to fix a crooked board.
The transition from wood to wall is where the final quality is determined. We use a high-quality wood filler for nail holes and mitre joints because it sands down to a hard, invisible finish. Decorators caulk is different. It is a flexible acrylic sealant designed only for the long gap between the top of the skirting and the wall. It allows for the slight movement that occurs whilst the house breathes without the seal cracking. After the filler has dried, a final sand with 120-grit paper ensures the surface is smooth. Always apply a dedicated wood primer before your top coat of paint to prevent the grain from rising or the knots from bleeding through.
Managing Uneven Walls and Floors
If your floor is particularly uneven, you may need to “scribe” the bottom of the skirting board. This involves propping the board up so it’s level, then using a compass to trace the floor’s contour onto the timber. You then cut along this line with a jigsaw or a block plane. For walls that bow outwards, we use heavy-duty fixings to pull the board tight against the masonry. If there’s a high spot on the wall that’s pushing the board out, a block plane can be used to shave a few millimetres off the rear of the timber. This allows the board to sit closer to the wall without losing its straight front face.
When to Call a Professional Joiner in Leicester
Some projects go beyond a standard weekend DIY task. Curved bay windows or complex wraparound architraves require a level of precision that only comes with years of experience. If you’re already investing in a high-end kitchen installation, having the woodwork finished to the same standard is essential for a cohesive look. We ensure that every joint is seamless and every line is true, regardless of how “wonky” your walls might be. Our professional skirting and architrave fitting service provides Leicestershire homeowners with a durable finish that adds genuine value to the property. If you’re struggling with a challenging layout, we’re here to help you achieve that elusive “no-gap” finish.
Transform Your Interior with Professional Joinery
Achieving a flawless finish is about more than just cutting timber; it’s about understanding the unique quirks of your property. It takes patience and the right tools. By mastering the art of the scribe and setting a consistent reveal, you can turn basic mouldings into a high-end feature that adds real value to your home. These professional techniques ensure your skirting and architrave fitting stands up to the demands of modern design whilst protecting your walls from daily wear and tear. A well-executed installation makes every room feel more polished and complete.
We’ve spent over 10 years perfecting our craft across Leicestershire. We specialise in bespoke woodwork and property maintenance, helping local homeowners navigate the specific challenges of uneven Victorian walls and complex layouts. If you’re ready to upgrade your interior with expert precision, contact CPT Services for a professional carpentry consultation in Leicester. We provide free, no-obligation quotes for all interior joinery projects. Take the next step toward a home you’re proud of today and enjoy a finish that lasts for years.
Frequently Asked Questions
Do I fit skirting or architrave first?
You should always fit the architrave before the skirting boards. The skirting board butts up against the edge of the architrave, so having the door frame finished first provides a solid stop for your skirting runs. This order ensures you don’t end up with awkward gaps or mismatched heights where the two mouldings meet. It’s a standard practice for any professional skirting and architrave fitting project.
Can I fit new skirting over the top of old boards?
We don’t recommend fitting new boards over old ones. Whilst “skirting covers” exist, they make your walls look unnaturally thick and reduce the available floor space in your room. Removing the old boards allows you to inspect the condition of the plaster and ensures your new timber sits flush against the wall. It results in a much cleaner, more durable finish that adds real value to your property.
What is the best adhesive for fitting skirting to a plastered wall?
A high-strength “grab” adhesive is the best choice for securing timber to plaster. These modern adhesives provide an immediate bond, though we always suggest using a few mechanical fixings like lost head nails for extra security whilst the glue cures. Ensure the wall is free from loose dust or peeling paint before application. This ensures the adhesive can bite into the solid plaster for a permanent hold.
How do I fix skirting boards to a damp-proofed wall without drilling?
You should use a high-tack hybrid polymer adhesive if you cannot drill into a damp-proofed wall. Drilling can puncture the damp-proof membrane, which leads to moisture issues later. Apply the adhesive in beads along the back of the board and press it firmly against the wall. You may need to use heavy weights or props to hold the board in place until the bond is fully set.
Is MDF or real wood better for architraves in a busy hallway?
Real wood is often the better choice for busy hallways because it’s more resilient to physical impact. Whilst MDF is popular for its smooth finish and stability, it can dent or “fluff up” if it’s hit hard by vacuum cleaners or bags. Hardwoods like oak are much tougher. If you prefer a painted look, high-density moisture-resistant MDF is a sensible middle ground that offers decent durability for a lower cost.
How do I hide the nail heads in my new skirting?
You can hide nail heads by using a nail punch to drive them roughly 2mm below the timber surface. Once the nail is recessed, fill the small hole with a high-quality wood filler. After the filler has dried, sand it flush with 120-grit sandpaper. This process ensures that once the primer and top coat are applied, the fixings become completely invisible to the naked eye.
Why are my mitre joints opening up after a few months?
Mitre joints usually open up because the timber hasn’t been properly acclimatised to the room’s humidity. As the wood dries out or absorbs moisture, it expands and contracts, pulling the joint apart. This is why we emphasise scribing internal corners rather than mitring them. Scribed joints are designed to overlap, which means any movement remains hidden from view, keeping your skirting and architrave fitting looking sharp year-round.
Can I use a hand saw for skirting and architrave fitting?
You can use a hand saw, but you’ll need a fine-toothed tenon saw and a mitre box for any level of accuracy. Hand-cutting requires a steady hand and a lot of patience to get the angles exactly right. Whilst it’s possible for small repairs, most professionals use power mitre saws to ensure every cut is perfectly crisp. For scribing, a hand-held coping saw remains the essential tool for the job.